Jonathan Hammer
Environment & Texture Artist / 3D Modeling
ENVIRONMENT MODELING
///////////////////////////////////////////////////////////////////////////////////////////////////////////////////////////////////
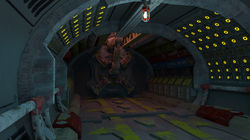
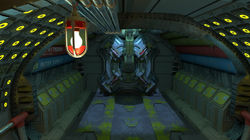
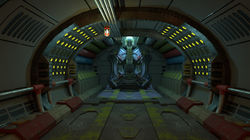
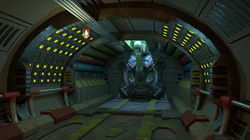
Indoor low-poly
environment
A low-poly scene with a budget of 35,000 tris focusing on lighting and mood.
Sci-fi Hallway
indoor environment
 |  |  |
|---|---|---|
 |  |  |
 |
This scene was created using Maya, Arnold Renderer, and Substance Painter. The hallway uses modular pieces which can be easily interchanged to customize the look and feel of the hallway. The textures used in this scene contain Albedo, Specular, Metallic, Normal, and Emissive maps as well as Transparency. Multiple shots are provided with different lighting schemes to experiment with mood and drama.
PROP MODELING
Quigley Sharps Precision Rifle
Based on the Quigley Sharps precision rifle. Modeled in Maya.
///////////////////////////////////////////////////////////////////////////////////////////////////////////////////////////////////
Room To Grow
These assets were created for Room To Grow, a short animated film all about knitting produced by Project X Studios.


Bugatti Coup Deville
Low and High poly models of the Bugatti Coupe Deville modeled in Maya with Arnold shaders applied.
Character Modeling and Texture
Semi-Humanoid Character


Lil' Boonch Character

 |  |
|---|
From Scratch-
This character was inspired as a caricature of my wife. The character is fully rigged in with switches allowing for IK and FK control of the arms and legs. The spine is able to squash and stretch using a spine rotation solvers for gradual spine rotation.
///////////////////////////////////////////////////////////////////////////////////////////////////////////////////////////////////
Japanese Ruins environment


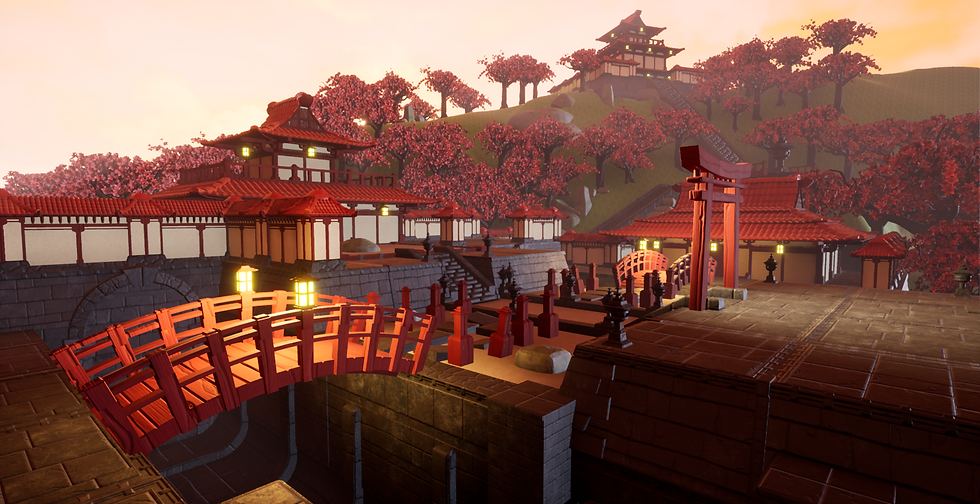


This outdoor environment was created within Unreal Engine 4 using Maya, ZBrush, and Substance Painter. Creation centered on making modular assets that can populate an entire scene quickly leaving more time to focus on composition and visual impact.
Creative Process


The workflow for the Japanese Ruins scene started with concept sketches. After selecting the best sketches, the scene was then reconstructed in UE4 using the BSP brushes and some rudimentary quick models as placeholders. After the layout was finalized, the scene was analyzed and areas where repeating textures and assets could be used were identified. Trim sheets were made for these assets using ZBrush and Substance Painter and then applied to models in Maya. Modular assets were made and then applied to the scene in UE4. The final step was modeling and texturing the "Hero" objects within the scene such as the Pagodas.